
Entertainment
How Can You Master Survival in Minecraft 2026?


Introduction:
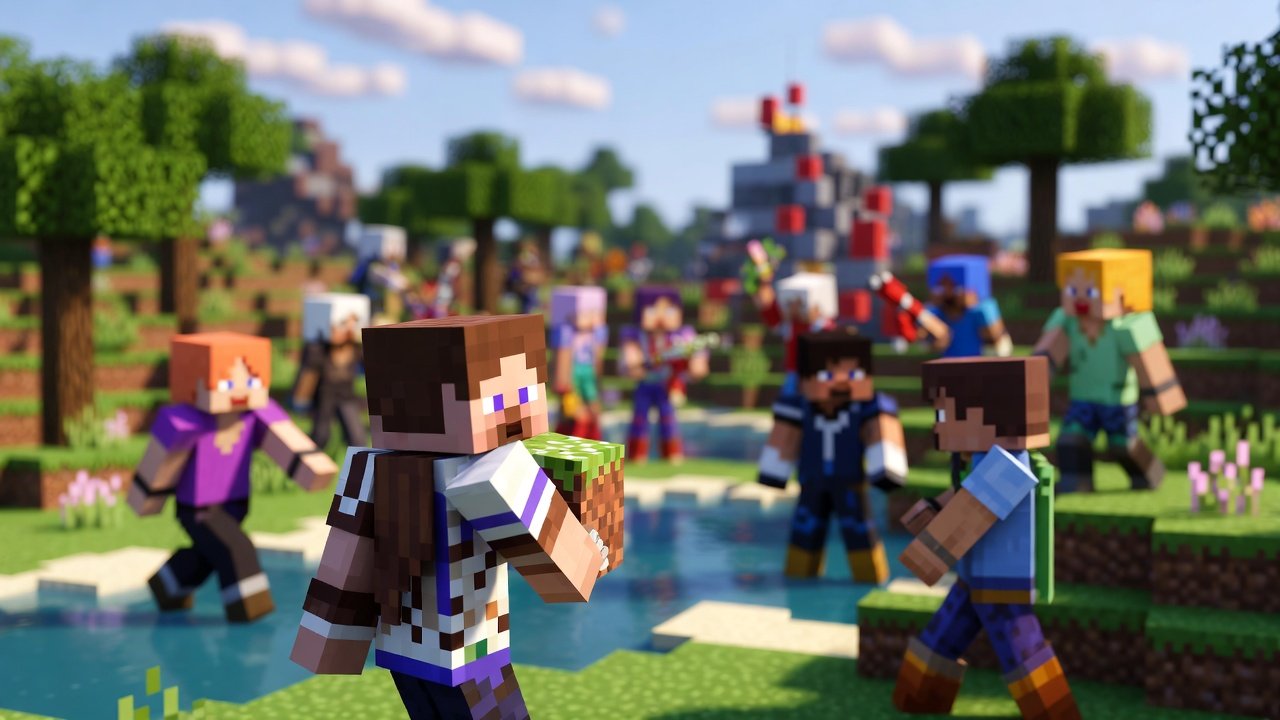
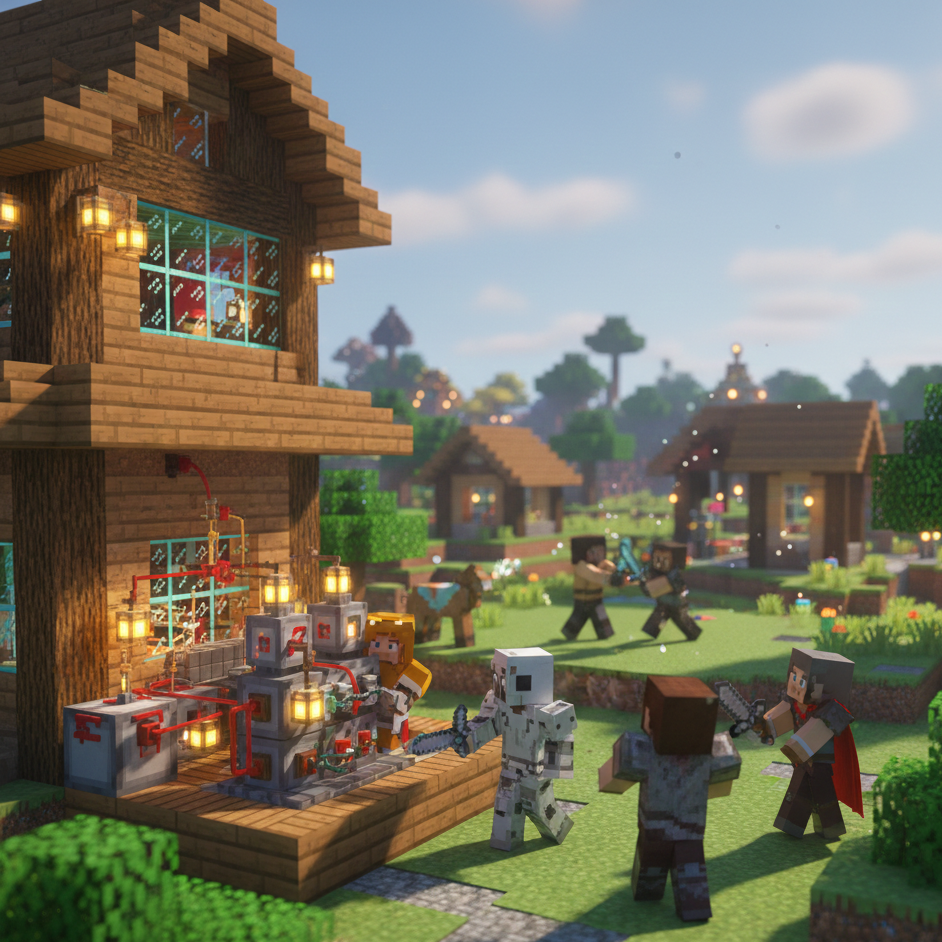
For millions of players worldwide, Minecraft isn’t just a game; it’s a digital canvas, an engineering playground, and a social hub all rolled into one. But stepping into its vast, blocky world can feel overwhelming. Between surviving your first night, deciphering community slang, and mastering complex systems like Redstone or enchanting, the learning curve is real.
This guide is designed to be your definitive roadmap. Whether you’re a newcomer puzzled by terms like “Creeper,” “Biome,” or “SMP,” or an intermediate player looking to refine your survival strategies and understand gameplay trends, we’ve got you covered. We’ll move beyond the basics of mine and craft to explore the rich tapestry of mechanics, community culture, and expert techniques that make Minecraft endlessly captivating.
Whether you’re a newcomer exploring your first blocky world or a veteran player diving into multiplayer servers, understanding Minecraft terminology is essential for effective communication and gameplay mastery. The Minecraft community has developed an extensive vocabulary that spans core game mechanics, streaming culture, and competitive gameplay elements.
This comprehensive guide breaks down the most important Minecraft terms you’ll encounter across survival gameplay, creative building, multiplayer servers, and content creation. By the end of this article, you’ll confidently navigate conversations with other players, understand tutorial videos, and participate fully in the vibrant Minecraft community.
Let’s explore the language that connects millions of players worldwide.

Part 1: Understanding Minecraft’s Core Foundations
To thrive in Minecraft, you need to speak its language. These are the fundamental terms and concepts that define the experience.
The Two Pillars: Survival vs. Creative Mode
Your entire approach to the game hinges on this choice.
Survival Mode
This is the heart of the classic Minecraft experience. You must mine for ore, craft tools and armor, manage hunger, and defend against hostile mobs. The ultimate goal is often to defeat the Ender Dragon. Every resource is earned, making accomplishments deeply satisfying.
Creative Mode
An unlimited sandbox. You have access to all blocks and items, can fly, and are invincible. This mode is for builders, artists, and redstone engineers to realize grand visions without constraints.
The World Around You: Biomes, Structures, and Dimensions
These are distinct geographical regions, each with unique terrain, blocks, weather, and creatures. From the arid Desert (ideal for finding Temples) to the snow-covered Taiga or perilous Jungles, biomes dictate your resource-gathering strategy.
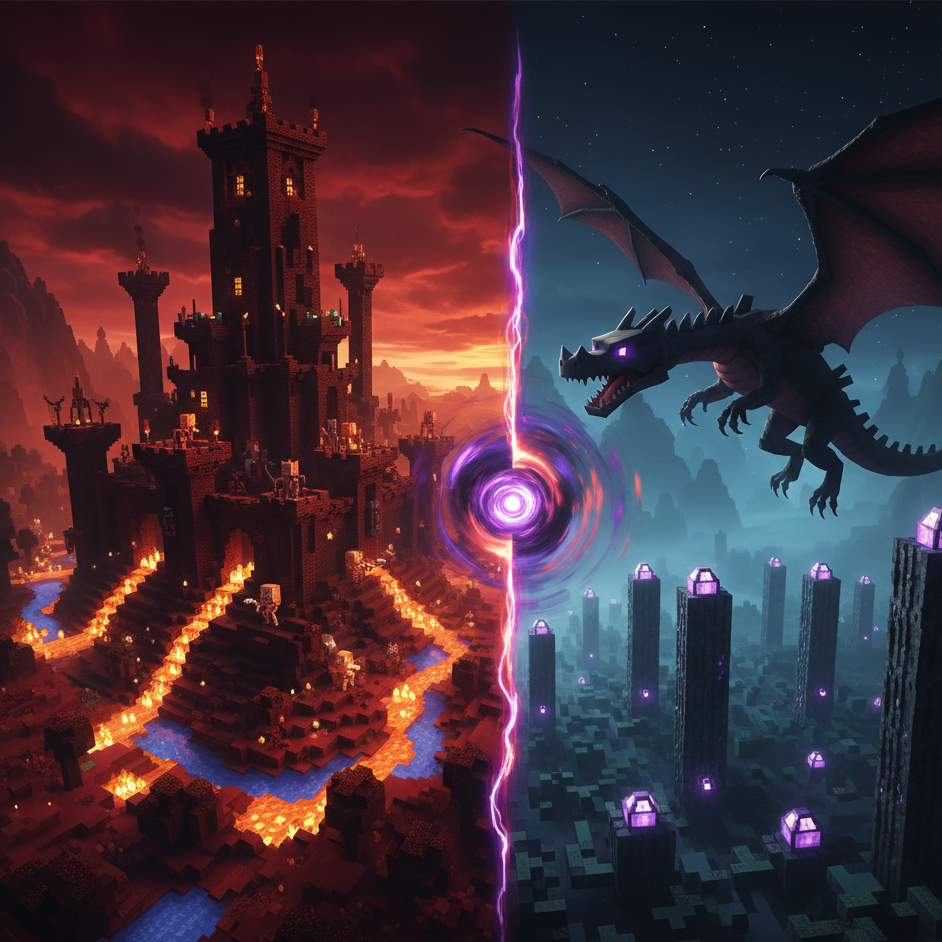
The Nether and The End
Minecraft’s other dimensions. The Nether is a dangerous hellscape, a source of Blaze Rods for potions and unique materials for advanced gear. The End is a barren dimension where you face the game’s final boss, the Ender Dragon.
Entities and Encounters: Understanding Mobs
“Mobs” are all living, moving entities.
- Passive Mobs: Animals like cows, pigs, and sheep provide food and materials.
- Neutral Mobs: Like Endermen, they attack only if provoked.
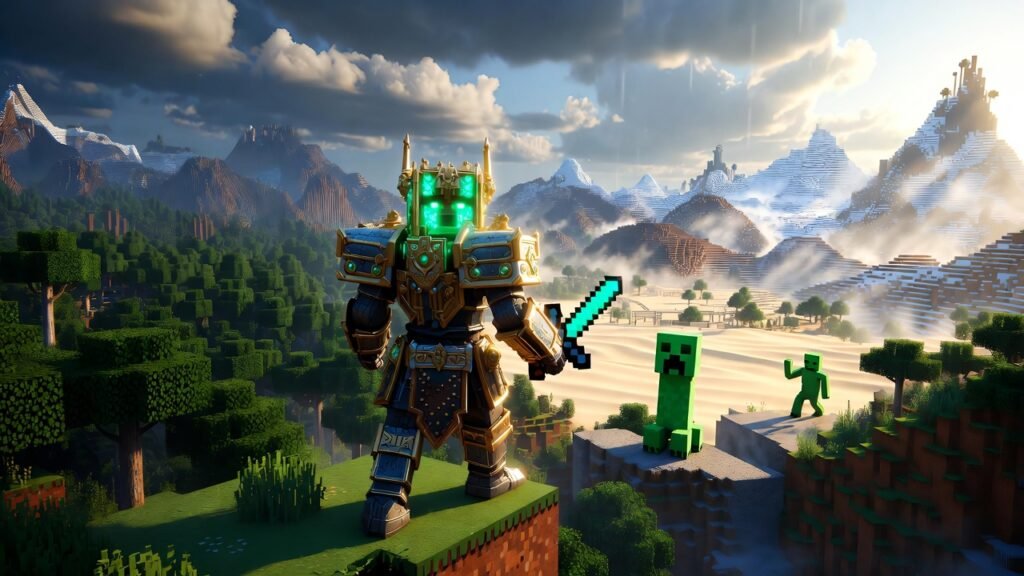
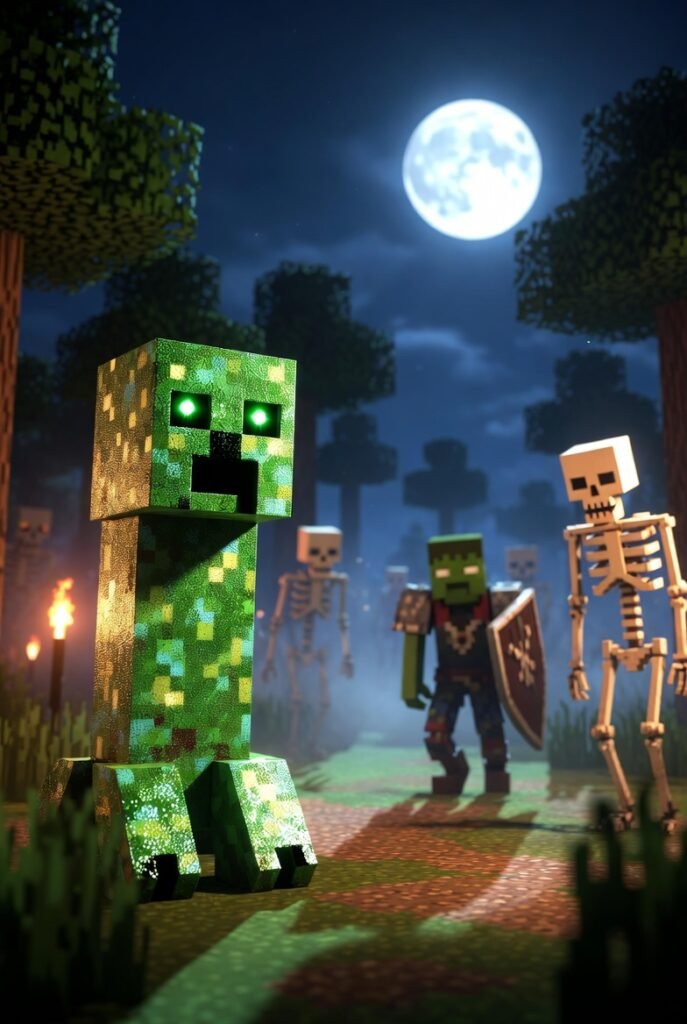
- Hostile Mobs: The enemies that spawn in the dark. The infamous Creeper is the most iconic—a silent, green stalker that explodes, damaging you and your carefully built structures.

Core Game Mechanics and Terms
Understanding Minecraft Game Modes
Minecraft offers distinct gameplay experiences through different modes, each with unique rules and objectives.
Survival Mode represents the classic Minecraft experience where players must gather resources, maintain health and hunger bars, and defend against hostile mobs. This mode challenges you to mine materials, craft tools, build shelters, and ultimately defeat the Ender Dragon. Death results in respawning and potential loss of items, making strategic planning essential.
Creative Mode removes all survival constraints, granting unlimited resources and invincibility. Players can fly freely, instantly break blocks, and access every item in the game through the inventory menu. This mode excels for building massive structures, testing redstone contraptions, and unleashing architectural creativity without resource limitations.
Adventure Mode restricts block breaking and placing unless using properly enchanted tools. Map makers primarily use this mode for custom experiences, ensuring players follow intended paths and challenge sequences without bypassing obstacles.
Essential Minecraft Entities and Creatures
Mobs serve as the umbrella term for all moving creatures in Minecraft, categorized into hostile, passive, and neutral behaviors.
The Creeper stands as Minecraft’s most iconic hostile mob, recognizable by its green pixelated appearance and devastating explosive ability. These silent stalkers approach players without warning sounds, detonating when close enough to cause significant terrain damage and player death. Understanding creeper behavior—maintaining distance, using shields, or creating protective barriers—is fundamental to survival gameplay.
The Ender Dragon represents Minecraft’s primary boss encounter, residing in The End dimension. Defeating this powerful entity requires extensive preparation, including gathering ender pearls, crafting eyes of ender, locating the stronghold, and equipping yourself with enchanted diamond or netherite gear. This achievement marks the symbolic “completion” of Minecraft’s main progression path.
Dimensional Exploration
The Nether functions as Minecraft’s hellish underworld dimension, accessed through obsidian portals. This dangerous realm features unique biomes, exclusive resources like ancient debris (for netherite), and hostile mobs including ghasts, piglins, and blazes. The Nether’s accelerated travel mechanics make it valuable for long-distance transportation in the Overworld.
Biomes define distinct environmental regions with unique terrain features, vegetation, climate, and mob spawns. From lush jungles and frozen tundras to desert temples and mushroom islands, biomes determine available resources and gameplay strategies. Understanding biome characteristics helps players locate specific materials and plan effective exploration routes.
Part 2: Mastering Gameplay Systems
Once you understand the world, it’s time to master its systems.
The Progression Loop: Mine, Craft, Enchant, Brew
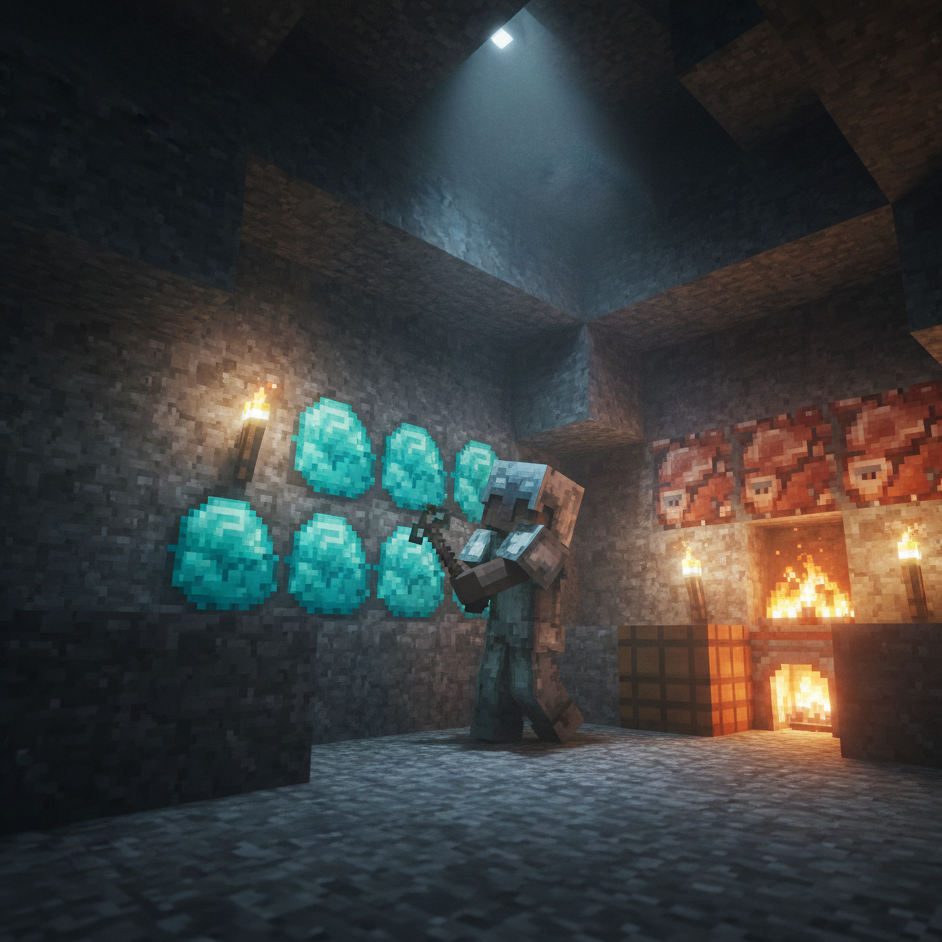
- Mine: Gather basic materials (wood, stone) and rare ores like Iron, Diamond, and Ancient Debris (Netherite).
- Craft: Transform raw materials into tools, weapons, armor, and complex machinery at a crafting table.
- Enchant: Use an Enchanting Table and Experience levels to add magical boosts to your gear, like Fortune (more ore drops) or Protection (better armor).
- Brew: Create potions using a Brewing Stand. Potions grant temporary buffs like Fire Resistance (vital for the Nether) or Strength (crucial for PvP and boss fights).
The Power of Redstone: Minecraft’s Engineering
Redstone is the game’s equivalent of electrical circuitry. With it, you can create:
- Simple automatic farms (harvesting wheat or mobs).
- Complex traps for challenge maps or PvP.
- Incredible automated doors, hidden passages, and even working computers.
Learning Redstone moves you from a survivor to an engineer.
Multiplayer & Competitive Play: SMP, PvP, and UHC
SMP (Survival Multiplayer)
- A private or public server where players cooperate (or compete) in a shared Survival world. Community-run SMPs, like those popularized by streamers, have their own economies, lore, and social dynamics.
PvP (Player vs. Player)
Combat against other players. This ranges from casual skirmishes to highly competitive minigames with tailored kits.
UHC (Ultra Hardcore)
A brutal, popular gameplay variant. Natural health regeneration is disabled, and players must rely on Golden Apples or potions. It’s a high-stakes challenge often played in last-team-standing tournaments.
Crafting, Mining, and Item Systems
Resource Gathering Fundamentals
Mining forms the cornerstone of Minecraft progression, involving the extraction of valuable blocks and ores from underground cave systems and manually created tunnels. Efficient mining techniques include branch mining, strip mining, and cave exploration, each offering different risk-reward balances.
Ore refers to mineral blocks containing valuable materials. The progression typically flows from coal and iron through gold, diamond, and ultimately netherite. Each ore type requires specific pickaxe tiers for successful harvesting, with diamond and netherite providing the best tools and armor.
The Crafting System
Craft describes the process of combining materials in specific patterns using the crafting table or player inventory grid. Mastering recipes for essential items—tools, weapons, armor, and functional blocks—accelerates gameplay progression and survival capabilities.
Build encompasses the creative construction aspect, from simple survival shelters to elaborate architectural masterpieces. Building requires understanding block mechanics, structural integrity (particularly for overhangs), and aesthetic principles that distinguish functional structures from impressive creations.
Equipment and Enhancement
Armor provides damage reduction through four equipment slots: helmet, chestplate, leggings, and boots. Materials progress from leather through chainmail, iron, gold, diamond, and netherite, with each tier offering increased protection values. Proper armor maintenance and strategic enchanting significantly improve survival odds.
Enchant refers to the magical enhancement system allowing players to add powerful properties to tools, weapons, and armor. Using enchantment tables, anvils, and experience points, you can apply effects like Sharpness (increased damage), Protection (damage reduction), or Efficiency (faster mining). Understanding enchantment mechanics, including combining and repairing items, maximizes equipment effectiveness.
Potion represents brewable consumables providing temporary effects. Using brewing stands, blaze powder, and various ingredients, players create potions for healing, fire resistance, water breathing, strength, and numerous other benefits. Advanced potion brewing, including splash and lingering variants, proves invaluable for difficult encounters and exploration challenges.
Redstone and Technical Gameplay
Redstone functions as Minecraft’s electrical wiring system, enabling players to create complex contraptions, automated farms, traps, and even computational devices. This red dust transmits power signals between components like repeaters, comparators, pistons, and dispensers.
Understanding redstone mechanics ranges from simple door circuits to elaborate sorting systems and automated farms. Technical players exploit redstone’s capabilities to create incredibly efficient resource production, while casual players appreciate pre-built designs for quality-of-life improvements.
Common redstone applications include:
- Automated crop and animal farms
- Hidden doors and security systems
- Item sorters and storage solutions
- Minecart transportation networks
- Trap mechanisms for mob control
Multiplayer and Server Terminology
SMP: Survival Multiplayer Explained
SMP (Survival Multiplayer) describes servers where players experience survival mode together, typically with community rules, shared resources, and collaborative building projects. Popular SMP servers feature whitelisted communities, economy systems, and player-created governments.
Famous SMP examples like Dream SMP have elevated this format into entertainment content, blending gameplay with roleplay storytelling. These servers often establish unique lore, character arcs, and dramatic events that attract millions of viewers.
Competitive Gameplay Formats
PvP (Player versus Player) encompasses combat between players rather than mobs. PvP servers feature arenas, faction warfare, and competitive game modes requiring combat skill mastery, including critical hit timing, potion usage, and strategic positioning.
UHC (Ultra Hardcore) represents a competitive format where natural health regeneration is disabled, making golden apples and potions the only healing methods. UHC games typically feature shrinking world borders, forcing player confrontation until one survivor remains. This high-stakes format demands resource efficiency, combat proficiency, and strategic decision-making.
World Generation
Seed refers to the numerical or text string determining world generation patterns. Each seed creates unique terrain, biome placement, structure locations, and ore distribution. Players share interesting seeds featuring rare spawns, convenient resource proximity, or stunning landscapes. Speedrunners analyze seeds to optimize completion times by spawning near strongholds with favorable loot.
Part 3: The Minecraft Community and Content Landscape
The game’s culture is a huge part of its longevity. Here’s how to navigate it.
Content Categories: From Tutorials to “Funny” Moments
Content creators have defined several key genres:
- Tutorial / Guide: Step-by-step videos on builds, Redstone, or game mechanics.
- Let’s Play: A long-form series following a player’s journey, often in an SMP.
- Challenge: Self-imposed hard rules (e.g., “One Block Skyblock”).
- Adventure Maps: Custom, story-driven worlds downloaded by players.
- Minecraft Shorts: Quick, snappy videos showcasing a cool trick, funny moment, or impressive build snippet.
- Hardcore: A Survival series where death is permanent, creating intense narrative stakes.
Finding Your World: The Importance of Seeds
A seed is a code that generates your world. Sharing a seed lets others play in the exact same world, which is invaluable for tutorials, exploring rare biome combinations, or starting a communal SMP with a known, good landscape.
| Feature | Survival Mode | Creative Mode |
|---|---|---|
| Primary Goal | Resource gathering, progression, survival | Unlimited building and creation |
| Resources | Must be collected through mining, farming, etc. | All blocks/items are freely available |
| Health/Hunger | Yes, must be managed | No, player is invincible |
| Mobs | Yes, both hostile and passive | Only spawn if placed by player |
| Best For | Players seeking challenge, adventure, and accomplishment | Players focused on architecture, design, and complex Redstone |
Content Creation and Streaming Terms
The Minecraft content creation community has developed specific terminology reflecting popular video formats and viewer preferences.
Gameplay videos showcase standard Minecraft sessions, whether survival progression, creative building, or multiplayer interactions. These form the foundation of Minecraft content, documenting genuine player experiences and discoveries.
Tutorial content teaches specific techniques, from basic crafting recipes to advanced redstone contraptions and building techniques. Quality tutorials balance clear instruction, visual demonstrations, and replicable step-by-step guidance.
Let’s Play series document ongoing survival worlds across multiple episodes, building narrative through gradual progression, project development, and spontaneous adventures. This format creates viewer investment through continued storytelling and achievement milestones.
Challenge videos impose special restrictions or objectives beyond standard gameplay, such as beating Minecraft using only wooden tools, surviving in superflat worlds, or completing speedrun attempts. These creative constraints produce unique entertainment value and showcase player ingenuity.
Minecraft Shorts adapt gameplay into brief vertical video formats optimized for platforms like YouTube Shorts and TikTok. These condensed clips highlight impressive builds, funny moments, or quick tips designed for mobile viewing and maximum shareability.
Adventure content explores custom maps, modpacks, and unique gameplay scenarios beyond vanilla Minecraft. These videos often feature puzzle-solving, parkour challenges, or narrative-driven experiences created by community map makers.
Funny moments compilations capture humorous glitches, unexpected events, creative pranks, and amusing multiplayer interactions. This lighthearted content appeals broadly and often goes viral through relatable gaming mishaps.
Common New Player Mistakes and Myths
Avoid these pitfalls to accelerate your progress:
- Mistake: Digging Straight Down. You will likely fall into lava or a deep cavern. Always dig in a staircase pattern or 2×1 hole.
- Mistake: Ignoring a Shield. A simple shield is the most overpowered early-game item. It blocks Creeper explosions, skeleton arrows, and more.
- Myth: “Diamonds are Common in Lava Lakes.” While lava level (Y=-54) is good, diamonds spawn in veins anywhere below Y=16. Strip mining is more reliable.
- Mistake: Hoarding Experience. Use your XP to enchant gear as soon as you can. Better gear means safer mining and faster resource collection.
- Myth: “The Nether is Only for Late-Game.” Visiting the Nether early for Blaze Rods (to make Potions of Fire Resistance) actually makes later exploration safer.
Common Mistakes and Misconceptions
Many players, particularly beginners, encounter similar challenges when learning Minecraft terminology and mechanics.
Confusing Game Modes: New players sometimes attempt survival strategies in creative mode or expect creative freedoms in survival, leading to frustration. Understanding mode-specific rules prevents wasted effort.
Misunderstanding Enchantment Mechanics: Players frequently waste experience levels on suboptimal enchantments or fail to combine books efficiently. Learning the anvil’s “Too Expensive” limit and enchantment compatibility saves valuable resources.
Inefficient Mining Techniques: Random digging wastes time and tools. Proper branch mining at optimal Y-levels (different for each ore since the Caves & Cliffs update) dramatically improves resource collection efficiency.
Neglecting the Nether: Some players avoid the Nether due to its dangers, missing essential materials like blaze rods (required for brewing and locating strongholds) and ancient debris (for netherite equipment).
Ignoring Biome Benefits: Not recognizing biome-specific resources limits gameplay options. For example, certain enchantments require bamboo (jungle biomes), while ice farming requires frozen biomes.

Expert Tips and Best Practices
For New Players
Start your Minecraft journey by establishing a secure base before nightfall. Prioritize crafting wooden tools, gathering essential resources (wood, stone, coal), and creating a shelter with adequate lighting to prevent mob spawns.
Learn fundamental crafting recipes for tools, torches, furnaces, and basic food preparation. These skills form the foundation for all subsequent progression.
For Intermediate Players
Focus on establishing sustainable resource systems including farms for food, wood, and mob drops. Automate repetitive tasks using basic redstone or simple designs copied from tutorials.
Prepare thoroughly before attempting the Nether or End dimensions. Proper equipment, backup supplies, and understanding dimension-specific dangers prevent frustrating setbacks.
- Villager Trading Hall: Set up a system to trap and trade with Villagers. You can get near-unbreakable diamond gear, powerful enchantment books, and rare materials for minimal cost (like paper and sticks).
- Essential First-Night Base: Don’t aim for a mansion. Dig into a mountain side, place a door, and use your first three iron to make a bucket. A water bucket can break falls, extinguish lava, and is a key PvP tool.
- Organized Storage: Labeled chests using item frames or signs will save you hours of searching. Group related items (building blocks, redstone components, farming outputs).
- Nether Travel: Use the Nether for fast travel. 1 block in the Nether equals 8 in the Overworld. Building safe, enclosed ice boat roads or using Striders on lava oceans is game-changing for large SMPs.
- Automate Everything: Use hoppers and observers to create automatic farms for crops, bamboo, sugar cane, and even hostile mobs. This gives you a steady resource income while you work on other projects.
For Advanced Players
Master technical Minecraft mechanics including optimal enchantment combinations, efficient farming designs, and advanced redstone contraptions. Study the game’s underlying systems to maximize efficiency.
Participate in community servers to experience different playstyles, from competitive UHC tournaments to collaborative SMP communities. This exposure broadens your Minecraft skills and connects you with like-minded players.
Advantages and Disadvantages of Different Playstyles
| Playstyle | Advantages | Disadvantages |
|---|---|---|
| Survival Mode | Challenging progression, resource management skills, achievement satisfaction | Time-intensive, risk of losing items, requires strategic planning |
| Creative Mode | Unlimited resources, focus on building, no combat stress | No survival challenge, achievements disabled, less gameplay variety |
| SMP Servers | Social interaction, collaborative projects, community events | Requires coordination, potential griefing, server-dependent experience |
| Technical/Redstone | Efficient automation, complex problem-solving, impressive contraptions | Steep learning curve, resource-intensive testing, potential lag issues |
| Content Creation | Community engagement, creative expression, potential income | Time-consuming editing, algorithm dependency, audience pressure |
Conclusion:
Minecraft’s true genius lies in its flexibility. Your journey can be a solitary survival adventure, a technical Redstone deep dive, a collaborative SMP saga with friends, or a peaceful creative build. The core loop of mine, build, and craft is simple, but the layers of enchanting, potion-brewing, community challenges, and engineering make it infinitely deep.
Understanding Minecraft terminology transforms your gaming experience from confused wandering to confident mastery. Whether you’re communicating with teammates in SMP servers, following tutorial content, or creating your own videos, this vocabulary forms the foundation of community participation.
Start by familiarizing yourself with core game mechanics—mobs, biomes, and basic crafting. Progress to understanding advanced systems like redstone and enchanting as your skills develop. If you’re interested in multiplayer, learn server-specific terms like PvP, UHC, and SMP formats.
Most importantly, don’t feel overwhelmed by the extensive terminology. The Minecraft community welcomes learners, and most players gladly explain unfamiliar concepts. Jump into the game, experiment with different mechanics, and gradually expand your vocabulary through practical experience.
Your Minecraft journey awaits—now you have the language to navigate it successfully.
Start by mastering the basics: survive the night, gear up with diamond armor, and defeat the Ender Dragon. From there, the world is literally your oyster. Find a community, experiment with seeds, or try your hand at creating Minecraft Shorts. Your unique story is waiting to be built, one block at a time.
Frequently Asked Questions(FAQ)
Is Minecraft free on PC?
No, Minecraft is not free on PC; you must purchase it, but you can play a limited, time-based demo for free to try the Java Edition, and some Microsoft/Xbox Game Pass subscriptions may offer it as part of the service. The full game requires a one-time purchase through the official Minecraft website or Microsoft Store, giving you access to both the Java and Bedrock editions on PC.
How to download Mojang Minecraft?
Go to Minecraft Launcher in the Microsoft Store. Choose your edition of Minecraft. Select Get or Install depending on your operating system and which editions you own
Is Minecraft an online game?
Minecraft can be played in both single-player (offline and alone) and multiplayer (online, with the ability to play with other players). Both Java Edition and Bedrock Edition have multiplayer turned off by default on child accounts. To enable multiplayer, read more in our Java guide and Bedrock guide.
How can I play Minecraft?
To play Minecraft, you buy and install the game, launch it, create a new world (choosing Survival for a challenge or Creative for building), and use WASD to move and the mouse to look, breaking blocks by holding left-click and placing them with right-click, while your first goals are gathering wood, crafting tools, building shelter, and finding food to survive the first night
Is Minecraft a $30 dollar fee?
The Java Edition is $29.99 (PC). The Bedrock Edition is $19.99-$29.99 (consoles) and $6.99 (mobile). The Deluxe Collection (PC) is $39.99. Realms Plus subscriptions and Marketplace purchases are extra.
One response to “How Can You Master Survival in Minecraft 2026?”
-
[…] Minecraft AI mods […]


Introduction:
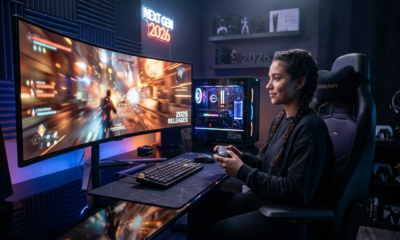
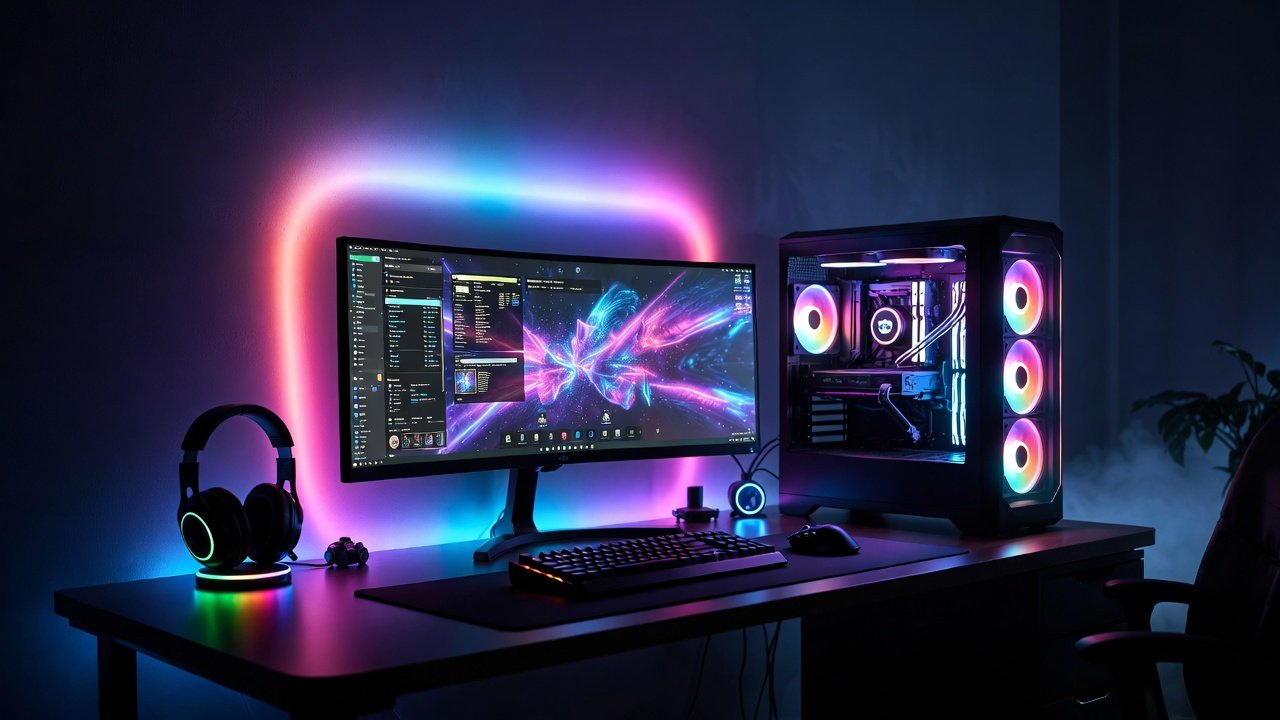
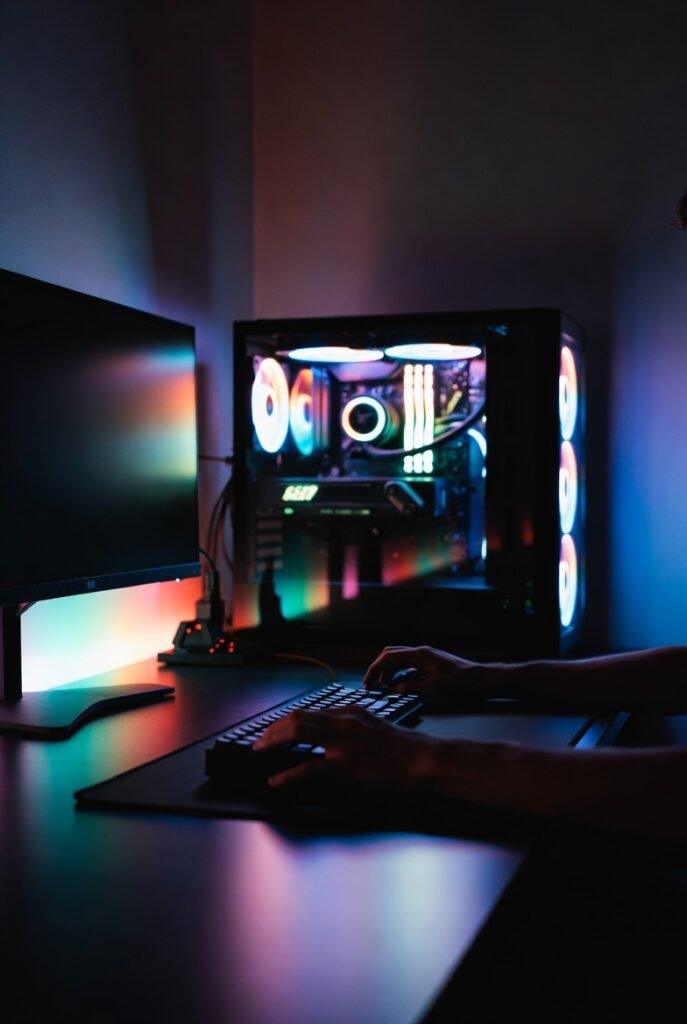
A minimal RGB gaming desk setup gives you the best of both worlds: clean, distraction‑free ergonomics with just enough lighting to feel immersive and modern. Instead of a cluttered, nightclub-style battlestation, you get a calm space that works for gaming, work, and content creation.
In 2026, this style fits perfectly with popular titles like GTA 6, Valorant, Call of Duty, and Fortnite, where focus and visibility really matter. At the same time, RGB strips, soft backlighting, and synced peripherals still create that satisfying gaming vibe without looking messy.
In this guide, you’ll learn how to build a minimal RGB gaming desk setup, even in a small room or on a budget, with practical layouts, lighting ideas, and real‑world examples.

What Defines a Minimalist RGB Gaming Desk Setup?
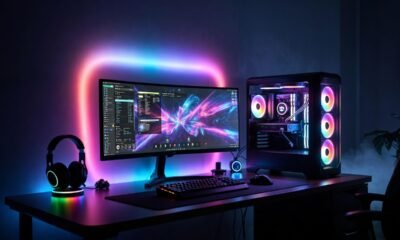
A minimalist setup isn’t just an empty desk; it is a curated space where every item serves a purpose. When you add RGB into the mix, the goal is to use light as an architectural element rather than a chaotic distraction.
In 2026, the best minimal RGB gaming desk setup ideas focus on “hidden” lighting. Instead of visible LED strips that sting the eyes, we look for diffused glows that emanate from behind monitors or under the desk surface. This creates a floating effect that feels modern and premium.
The Core Pillars of Minimalism in Gaming
- Decluttered Surface: Only the essentials (mouse, keyboard, monitor) stay on top.
- Intentional Color Palettes: Sticking to one or two primary colors rather than a “rainbow vomit” effect.
- Cable Management: Hidden wires are the hallmark of a professional-grade setup.
- Quality Over Quantity: Investing in a few high-quality peripherals instead of dozens of cheap accessories.
15 Best Minimal RGB Gaming Desk Setup Ideas
1. The “Under-Glow” Floating Desk
Mount your desk to the wall (floating style) and run a high-density RGB strip along the back edge. By reflecting the light off the wall, you create a deep ambient glow that makes the desk appear to hover.
2. The Monochrome Cyberpunk Theme
Stick to a strictly black-and-white hardware theme. Use a single RGB accent color—like neon violet or ice blue—to provide a futuristic contrast. This is a staple for modern minimalist rgb gaming desks.
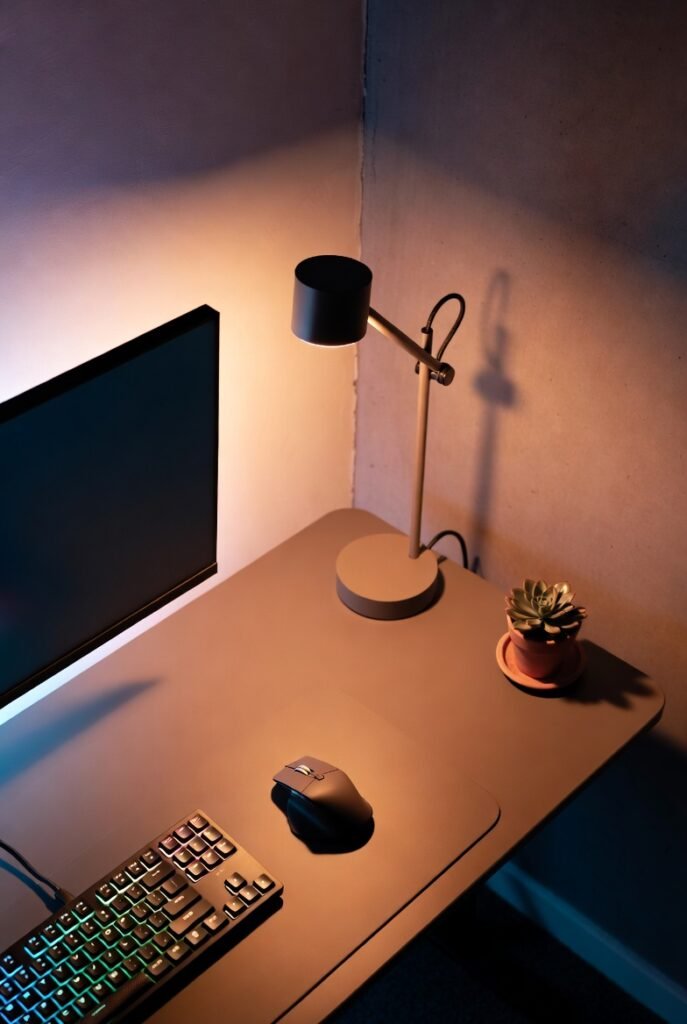
3. The Natural Wood and Warm RGB Blend
Contrast a walnut or oak butcher block desk with warm white or amber RGB lighting. This “Japandi” gaming style is incredibly popular in 2026 for those who use their gaming space for productive work during the day.
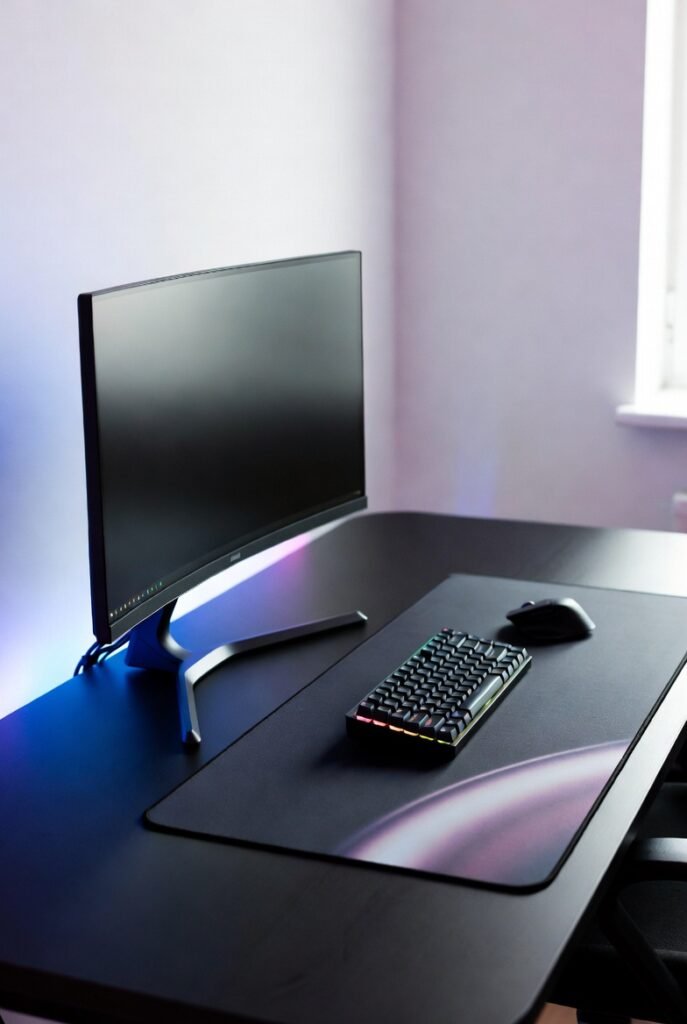
4. The Ultrawide Single-Monitor Setup
Nothing says minimalism like a single 34-inch or 49-inch ultrawide monitor. Use a monitor arm to clear desk space and attach an RGB light bar to the back of the screen for an immersive bias-lighting effect.
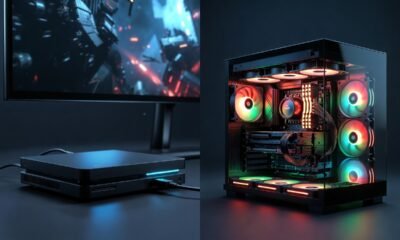
5. The “Hidden PC” Approach
Small Form Factor (SFF) cases are a gamer’s best friend. Mount your PC under the desk or hide it behind a monitor. Use internal RGB components to cast a subtle glow through the ventilation holes rather than having a massive glowing tower on the desk.
6. The 60% Keyboard and Wireless Mouse Combo
Eliminating wires is the fastest way to achieve a clean rgb gaming desk setup. A wireless 60% mechanical keyboard with subtle per-key RGB looks incredibly sharp against a large, dark desk mat.
7. Symmetry-Based Design
Place your speakers, PC, and lighting elements in a perfectly symmetrical layout. Use dual RGB towers on either side of the monitor to frame your field of vision.
8. The Vertical Secondary Monitor
For streamers or Discord users, a vertical secondary monitor saves horizontal space. Add a slim RGB strip to the outer edge of the vertical screen to balance the lighting across your peripheral vision.
9. Nano-Leaf Wall Integration
Instead of lighting the desk, use the wall. Minimalist geometric light panels (like Nanoleaf or Govee) can be arranged in a simple line or triangle to provide the room’s primary light source.
10. The Pegboard Organizer with Integrated LEDs
Use an IKEA Skådis pegboard to hold your controllers and headphones. Thread an RGB strip around the frame of the pegboard to turn your storage into a piece of glowing wall art.

11. Minimalist RGB Gaming Setup for Small Rooms
If you’re tight on space, use a 40-inch desk and a monitor light bar. Light bars sit on top of your monitor and illuminate your desk surface without taking up any footprint, providing a clean, functional glow.
12. The “Dark Mode” Aesthetic
Use a matte black desk, black 3D wall panels, and deep red or forest green RGB. This creates a moody, “stealth” environment that is perfect for late-night gaming sessions in Call of Duty or GTA 6.
13. Smart Home Integration
Sync your desk RGB with your smart home system. Set a “Gaming Mode” that dims the room lights, closes the smart blinds, and activates your desk’s RGB setup with a single voice command.
14. The Glass Top Reflection
A glass-top desk can reflect the RGB from your keyboard and mouse, doubling the light intensity without adding more strips. Note: This requires impeccable cable management as everything is visible.
15. The Hidden LED Channel
Use aluminum LED channels with frosted diffusers. Instead of sticking strips directly to the desk, these channels create a professional, smooth line of light that looks like it’s built into the furniture.
Essential Hardware for a Minimalist RGB Setup
To pull off these ideas, you need the right components. Below is a comparison of the key elements required for a budget minimal rgb gaming desk setup versus a premium one.
Setup Comparison Table
| Feature | Budget Minimalist Setup | Premium Minimalist Setup |
| Desk | IKEA Linnmon / Lagkapten | Fully Jarvis / Secretlab Magnus Pro |
| Lighting | Standard 5V RGB Strips | Philips Hue / Govee AI Sync |
| Keyboard | Wired 60% RGB Keyboard | Wireless Custom Mechanical (Aluminum) |
| Mouse | Wired Lightweight Mouse | Logitech G Pro X Superlight 2 |
| Cable Mgmt | Velcro Straps & J-Hooks | Integrated Magnetic Trays |
| Monitor Mount | Basic Gas Spring Arm | Premium Dual-Screen Hidden Mount |

Advantages and Disadvantages of Minimalist RGB Setups
Advantages
- Reduced Distractions: A clean desk helps you stay “in the zone” during competitive play.
- Easier Maintenance: Fewer items on the desk mean dusting and cleaning take minutes, not hours.
- Professional Versatility: A minimal setup easily transitions from a gaming station to a professional home office for Zoom calls.
- Better Airflow: Less clutter around your PC allows for better heat dissipation.
Disadvantages
- Cable Management Difficulty: Minimalist setups provide nowhere to hide wires, requiring significant time to route them perfectly.
- Higher Initial Cost: High-quality wireless peripherals and clean-looking furniture often cost more than standard gear.
- Rigidity: Once a setup is “perfected,” adding new gear can disrupt the aesthetic balance.
Common Mistakes and Myths
Myth: Minimalism Means No RGB
Reality: Minimalism is about restraint, not absence. You can have 10 different RGB sources as long as they are hidden or diffused and follow a consistent color theme.
Mistake: Neglecting the “Backside”
Many people focus on the front of the desk but leave a “spaghetti monster” of cables underneath. In a minimal setup, if the cables are visible under the desk, the entire aesthetic is ruined. Use a cable management tray or “sleeves” to group wires together.
Mistake: Mixing Too Many Software Eco-systems
Having Razer mouse software, Corsair keyboard software, and Govee light software can bloat your PC’s performance. In 2026, try to use a single “Open RGB” software or stick to one brand to ensure all lights sync perfectly.
Expert Tips for the Ultimate Clean Look
- Drill Through the Desk: If you have a dedicated desk, drill a small hole directly under your keyboard to route the cable. Cover it with your desk mat.
- Use a Desk Mat: A large, high-quality desk mat ties the entire setup together. It acts as an anchor for your mouse and keyboard.
- Color Temperature Matters: For a truly aesthetic rgb gaming desk setup, use a “Warm White” (3000K) for your room lighting and a contrasting “Cool Color” for your RGB. This creates depth in photos and videos.
- Monitor Arms are Mandatory: Replacing the bulky plastic stand that comes with your monitor with a sleek metal arm is the single biggest “minimalist” upgrade you can make.
Conclusion: Less Stuff, More Play
Creating the best minimal RGB gaming desk setup is a journey of refinement. By focusing on diffused lighting, wireless peripherals, and strict cable management, you can build a sanctuary that looks as good as it performs. Remember, the goal is to enhance your gaming experience, not to create a space that feels too clinical to actually use. Start with the basics—a clean desk and one light source—and build your dream setup one intentional piece at a time.
Actionable Takeaway: Start your minimalist journey today by removing three items from your desk that you haven’t used in the last week. Then, invest in a single 5-meter RGB strip for bias lighting behind your monitor.

2026 Updated
best gaming laptop for GTA 6
Xbox Cloud Gaming vs PS Cloud
Valorant 2026 pro settings guide
top VR headset 2026 review
GTA 6 how to unlock features
competitive FPS settings US gamers
Frequently Asked Questions (FAQ)
1. How do I hide cables in a minimal gaming setup?
Use a combination of under-desk cable trays, J-channels, and Velcro ties. For cables running up to the monitor, use braided cable sleeves to group them into a single “trunk.”
2. What is the best desk for a minimalist gaming setup?
The IKEA Karlby butcher block paired with Alex drawers remains a classic, but the Secretlab Magnus Pro is currently the gold standard for minimalist setups due to its integrated power supply and magnetic cable management.
3. Can I have a minimal setup with a large gaming PC?
Yes. The trick is to place the PC on a separate side-table or on the floor (on a stand) to keep the main desk surface clear. Alternatively, use a case with a clean, tempered glass side panel to make the PC look like a piece of art.
4. What RGB colors are best for focus?
Deep blues and greens are known to be less distracting and more calming. Avoid flashing or “breathing” patterns during competitive gaming, as the movement can catch your eye and ruin your focus.
5. Are wireless gaming mice as fast as wired ones in 2026?
Absolutely. Modern wireless technology (like Logitech’s Lightspeed or Razer’s Hyperspeed) has reached a point where latency is identical to, or even lower than, many wired mice.
6. How much does a minimal RGB setup cost?
A basic setup can be achieved for $200–$300 (excluding the PC) by using budget-friendly IKEA furniture and DIY cable management. High-end setups can easily exceed $2,000 for premium motorized desks and synced lighting ecosystems.
🔥 2026 Trending Games
GTA 6 🔥🔥🔥
- Call of Duty 2026
- Fortnite Chapter updates
- Valorant new agents
- EA Sports FC updates
- Minecraft AI mods
- Roblox creator economy
Cloud Gaming
- Xbox Cloud Gaming
- NVIDIA GeForce NOW
- PlayStation Cloud
- “No Console Gaming” trend
Gaming Hardware & Accessories
- Gaming laptops (RTX 4070/4080)
- Gaming monitors (240Hz / OLED)
- Mechanical keyboards
- VR headsets
Game Development / AI in Gaming
- AI NPCs
- Unreal Engine 5
- Game mods using AI
- “How AI is changing gaming”
- Esports & Competitive Gaming
- Valorant / CS2 / Fortnite esports
- Tournament prize pools
- Pro player setup
- iOS games updates
- Gacha games
- Strategy games
Gaming Subscriptions & Services
- Xbox Game Pass
- PlayStation Plus
- Ubisoft+
Gaming Security
- Account hacking
- Anti-cheat systems
- Game ban appeals
Leave a Reply Cancel reply
Related Post:
https://lyallpurgamezone.site/what-are-the-best-240hz-gaming-monitors-for-2026
https://lyallpurgamezone.site/10-reasons-why-pc-is-better-than-console
https://lyallpurgamezone.site/what-are-the-best-strategies-to-lower-gaming-ping
https://lyallpurgamezone.site/guide-to-the-best-gaming-ssds-gen4-vs-gen5-tested
https://lyallpurgamezone.site/how-to-create-a-1000-gaming-pc-for-2026
https://lyallpurgamezone.site/ultimate-top-7-ps6-specs-leaks-you-need-to-know


Introduction:
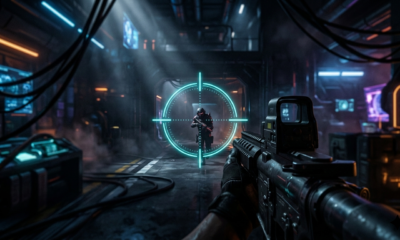
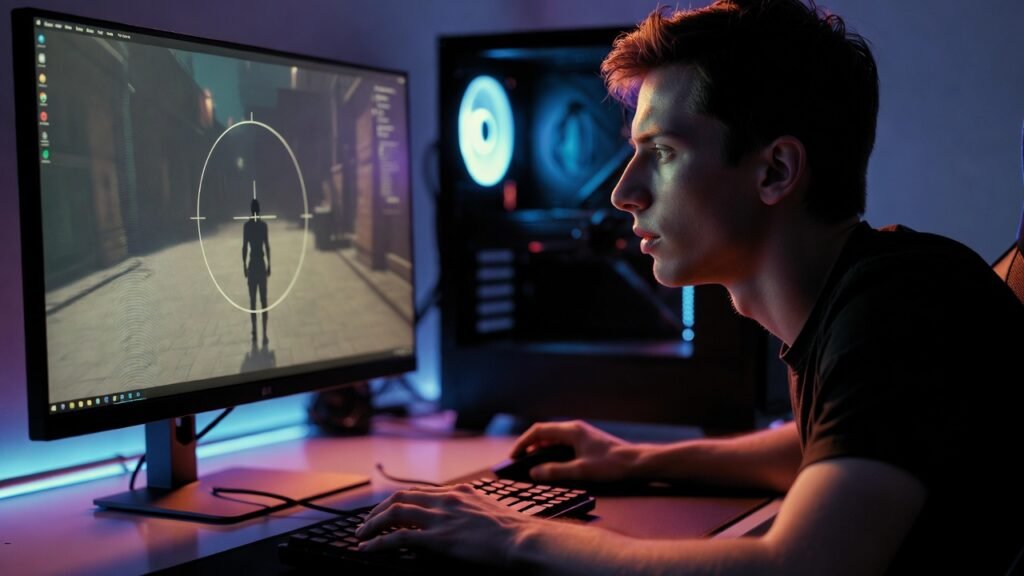
Your crosshair is one of the most important settings in Valorant. A clean, well‑tuned crosshair helps you see enemies clearly, line up headshots quickly, and stay consistent in ranked matches.
In 2026, many pro players use specific crosshair codes that you can copy directly into your game. These codes give you access to tried‑and‑tested setups without hours of trial and error.
This guide breaks down the best Valorant crosshair codes for 2026, including pro settings, small dot headshot machines, and beginner‑friendly options. You’ll also learn how to import codes, avoid common mistakes, and adjust settings to match your playstyle.

How Valorant Crosshair Codes Work
What Is a Valorant Crosshair Code?
Valorant lets you save and share crosshairs using a compact code string. When you paste this code into the crosshair settings, the game automatically recreates the exact shape, color, and style.
Each code controls settings like:
- Color (cyan, green, white, etc.)
- Inner and outer line length and thickness
- Center dot on or off
- Outlines and opacity for visibility on all maps
This system is also the backbone of every major Valorant crosshair database and crosshair generator site online.
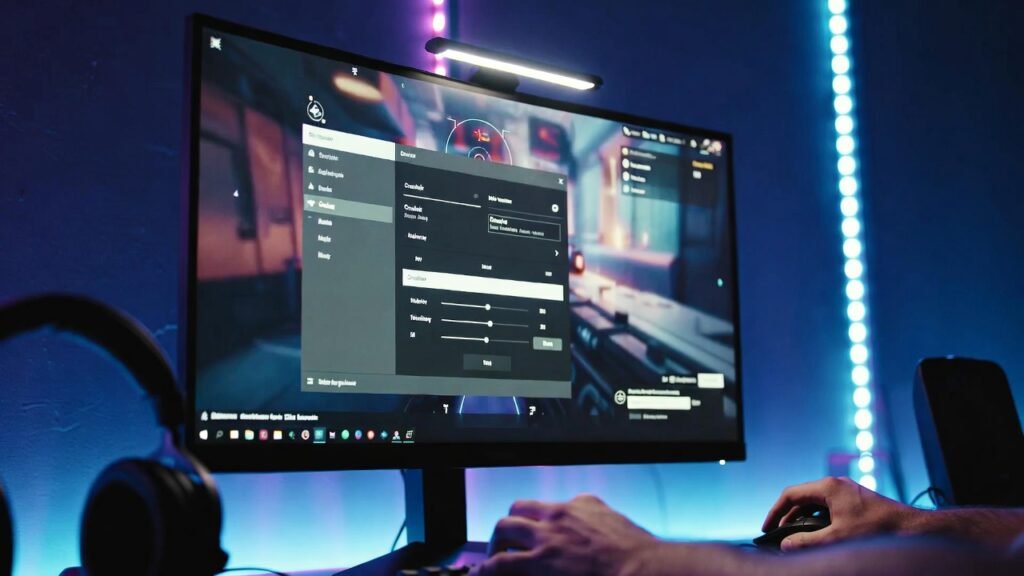
How to Import a Crosshair Code in Valorant
To use any of the crosshair codes in this article, follow these steps:
- Open Valorant and go to Settings.
- Click the “Crosshair” tab.
- At the top, click the crosshair profile drop‑down and select “Import Profile Code”.
- Paste the code, then click “Import”.
- Select the new profile to start using it immediately.
You can save multiple crosshairs and quickly switch between them depending on your role or mood.
Top 5 Best Valorant Crosshair Codes You Need to Try (2026)
Below are five high‑impact, battle‑tested crosshair codes you should test in 2026. They cover TenZ’s famous setup, a small dot crosshair, a clean beginner crosshair, a pro box/cross, and a versatile all‑rounder.
Note: Codes may appear slightly different on some monitors, so always tweak color and thickness to your own visibility preference.
1. TenZ Valorant Crosshair Code (Pro Favorite in 2026)
TenZ’s crosshair is one of the most copied in Valorant because it strikes a strong balance between visibility and precision. It’s a small, tight cross that works extremely well for headshots and flicks.
- Style: Minimalistic small cross
- Great for: Duelists, aim‑heavy roles, aggressive entry fraggers
- Crosshair code (popular 2026 variant):
This code uses a bright color and limited gap to keep your focus exactly where bullets land, which is ideal if you’re confident with your aim and want a pro‑level feel.
2. Best Small Dot Crosshair for Headshots
Small dot crosshairs are extremely popular among high‑level players who want a precise reference point for tapping and bursting. A good small dot makes it very easy to see exactly where your first bullet will land.
- Style: Tiny center dot, no distracting lines
- Great for: Riflers focused on one‑taps, disciplined spray control
- Example dot crosshair codes:
- Square dot (white):
0;P;o;1;d;1;z;4;0b;0;1b;0 - Round dot (white):
0;s;1;P;h;0;d;1;z;3;f;0;0t;3;0l;1;0o;1;0a;1;0f;0;1t;0;1l;0;1o;0;1a;0;1f;0
- Square dot (white):
Community feedback suggests keeping the dot only as big as your bullet tracer and using a high‑contrast color (yellow or green) for the best visibility on all maps.
3. Beginner‑Friendly Clean Crosshair (Safe, Clear, and Forgiving)
If you’re new to Valorant or FPS games, you don’t need an ultra‑tiny or flashy crosshair. A simple, slightly larger cross with a clear center makes it much easier to track enemies and learn crosshair placement.
- Style: Medium‑sized cross, no center dot, clear gap
- Great for: Beginners and casual players, those still learning recoil and movement
- Example beginner‑type pro crosshair (inspired by popular pro setups):
0;P;h;0;0l;4;0o;0;0a;1;0f;0;1b;0(used by multiple pros as a simple, visible cross)
This kind of crosshair is forgiving and works well at most ranges. You can always shrink it over time as your aim improves.
4. Pro Box / Compact Crosshair (For Consistent Rifling)
Many pros use tight, boxed crosshairs with short lines and minimal outer extensions. These crosshairs are very stable and help you focus on the enemy’s head rather than on your UI.
- Style: Small, compact cross with short lines
- Great for: Consistent rifling, disciplined peeking, anchor roles
- Example pro‑style codes from current lineups:
These crosshairs shine when you hold angles or swing for precise duels. They stay visible but do not block vision around the target.
5. Flexible All‑Rounder Crosshair (Good for Every Role)
If you like swapping roles or agents—Duelist one game, Controller the next—you want a crosshair that works in almost every situation. A slightly brighter, medium‑small cross with a visible outline is a strong all‑round choice.
- Style: Medium‑small, clear edges, strong color contrast
- Great for: Flex roles, ranked grinders, those who play multiple agents
- Example pro‑inspired flexible crosshair:
This setup remains visible even in smoke edges, bright backgrounds, and chaotic fights while still offering enough precision for crisp headshots.

Comparison of the Top 5 Valorant Crosshair Codes
| Crosshair type | Main use case | Difficulty to use | Ideal players |
|---|
Why Your Valorant Crosshair Settings Matter
Before we dive into the specific codes, it is essential to understand why players constantly tweak their Valorant crosshair settings. Your crosshair provides the visual feedback necessary for “center-screening”—the ability to keep your eyes focused on where the enemy’s head will appear.
- Visual Clarity: Pro players often use “Cyan” or “Green” because these colors rarely appear in the game’s environment, making the reticle easier for the brain to track.
- Precision vs. Tracking: Smaller crosshairs (like the small dot crosshair Valorant code) are superior for long-range taps, while slightly larger “cross” styles help with spray control and tracking moving targets like Neon or Jett.
- E-E-A-T in Aiming: Reliability and consistency are key. By using a Valorant crosshair database of pro settings, you are adopting configurations that have been tested under the highest pressure imaginable.
1. TenZ Valorant Crosshair Code (The Classic Cyan)
Even in 2026, the TenZ Valorant crosshair code remains the most sought-after configuration in the community. Known for his “human aimbot” mechanics, TenZ prefers a small, cyan-colored cross that offers a perfect balance between visibility and precision. It is small enough to hit long-range headshots on Haven’s C-long but visible enough to track during a chaotic frenzy.
- The Code:
0;s;1;P;c;5;h;0;m;1;0l;3;0o;0;0a;1;0f;0;1b;0;S;c;5;o;1 - Why it works: The lack of a center gap means you have a solid point of reference for every shot.
2. Aspas “The King of Tracking” Crosshair
As one of the world’s best duelists, Aspas uses a minimalist setup designed for aggressive entry-fragging. If you play high-mobility agents, this is the best Valorant crosshair for headshots while moving or counter-strafing. It uses a thin profile that doesn’t “bloom” or distract you during high-speed engagements.
- The Code:
0;s;1;P;o;1;d;1;0b;0;1b;0;S;c;0 - Why it works: High contrast and a tight center point allow for “snap” aiming, which is vital for flicking to corners.
3. The “Small Dot” Precision Crosshair
The small dot crosshair Valorant code has seen a massive resurgence in 2026. This style is preferred by “aim purists” who want zero obstruction. If you find that traditional lines distract you from seeing the enemy’s head, the dot is your best friend.
- The Code:
0;P;c;1;o;1;d;1;0b;0;1b;0(Green Dot) - Why it works: It forces you to be incredibly precise. If the dot is on the pixel, the shot lands. It is widely considered the best choice for Vandal users who prioritize first-bullet accuracy.
4. Demon1 “World Champion” Settings
Demon1’s rise to the top was fueled by his calm, robotic aim. His crosshair reflects this—it is simple, white, and small. It is often cited as the best Valorant crosshair for beginners who want to emulate pro habits without the visual clutter of more complex “circle” or “hollow” designs.
- The Code:
0;s;1;P;o;1;d;1;m;1;0b;0;1b;0 - Why it works: The white color with black outlines makes it visible on every map, from the snowy dunes of Icebox to the bright sun of Sunset.
5. ZmjjKK (KangKang) “The Operator” Crosshair
For those who primarily use the Operator or want a crosshair that feels “snappy” on snipers, the EDG superstar ZmjjKK offers a unique configuration. This crosshair is slightly more “open” than TenZ’s, providing a better view of the target area within the reticle.
- The Code:
0;P;h;0;d;1;f;0;0l;2;0v;2;0g;1;0o;1;0f;0;1b;0 - Why it works: It provides a great “frame” for the enemy model, making it easier to time your shots when an enemy peeks into your line of sight.
Comparison Table: Top 5 Valorant Crosshairs 2026
| Player/Style | Color | Type | Best For | Code Snippet |
| TenZ | Cyan | Small Cross | All-around / Rifling | 0;s;1;P;c;5;h;0;m;1... |
| Aspas | White | Tight Cross | Entry Fragging | 0;s;1;P;o;1;d;1;0b... |
| Small Dot | Green | Single Pixel | Long-range Taps | 0;P;c;1;o;1;d;1;0b... |
| Demon1 | White | Minimalist | Consistency | 0;s;1;P;o;1;d;1;m... |
| ZmjjKK | White | Open Cross | Sniping/OPing | 0;P;h;0;d;1;f;0;0l... |
Advantages and Disadvantages of Pro Crosshairs
Advantages
- Proven Results: These codes are used by players earning millions in prize money; they are mathematically optimized for the game’s FOV.
- Instant Import: No more fumbling with sliders. The Valorant crosshair generator system allows for 1-click updates.
- Reduced Visual Noise: Most pros disable “Movement Error” and “Firing Error” to keep their screen steady.
Disadvantages
- Subjectivity: A crosshair that works for a 24-inch 540Hz monitor might feel too small on a 27-inch 1440p screen.
- Color Blindness: Some “Pro” colors like Green or Red may not work for everyone.
- Placebo Effect: Changing your crosshair won’t fix bad crosshair placement Valorant habits or poor positioning.
Common Crosshair Myths and Mistakes
Myth 1: A smaller crosshair always means better aim.
Reality: While a tiny crosshair is great for long range, it can be very difficult to see during a chaotic site execute when flashes and smokes are everywhere. Sometimes, a slightly larger crosshair is better for “visual anchoring.”
Myth 2: You must use the same color as the pros.
Reality: Color is the most subjective part of pro Valorant settings. If you struggle to see Cyan on Pearl or Breeze, switch to Magenta or Yellow. High visibility is more important than following a pro exactly.
Mistake: Leaving “Movement Error” On
Most beginners leave movement error on to learn when they are accurate. However, the visual “blooming” of the crosshair can be incredibly distracting. Once you understand the basics of counter-strafing, turn it off for a cleaner view.
Expert Tips for Finding Your Perfect Crosshair
- Use a Valorant Crosshair Database: Don’t just stick to one. Spend 10 minutes in the Range trying five different codes to see which one feels “natural.”
- Test in Deathmatch: Never take a brand-new crosshair into a Competitive match. Test how it feels against moving targets in a low-stakes environment.
- Adjust for Resolution: If you play on “Stretched Res” (e.g., 1280×960), your crosshair will appear wider. You may need to decrease the thickness to compensate.
- Contrast is Key: If you find yourself losing the center of your screen during fights, try adding “Outlines” to your crosshair. It adds a 1-pixel black border that makes any color pop.
Conclusion
Finding the best Valorant crosshair codes is a journey of trial and error, but starting with pro-level settings gives you a massive head start. In 2026, the trend is clearly leaning toward small, static, and high-contrast designs that prioritize headshot accuracy over all else.
Whether you choose the surgical precision of the TenZ Valorant crosshair code or the minimalist efficiency of a dot crosshair, the most important thing is consistency. Once you find a code that feels right, stick with it—building muscle memory is the true secret to ranking up.
Ready to try them out? Copy your favorite code from the list above, head into your Valorant settings, and hit “Import.”
2026 Updated
Xbox Cloud Gaming vs PS Cloud
Valorant 2026 pro settings guide
top VR headset 2026 review
GTA 6 how to unlock features
competitive FPS settings US gamers
FAQ:
1. How do I import a crosshair code in Valorant?
To import a code, go to Settings > Crosshair > Primary. Look for the “Import Profile” icon (a small downward arrow) next to the Crosshair Profile dropdown. Paste the code and click “Import.”
2. What is the best crosshair color for Valorant?
Statistically, Cyan, Green, and Magenta are the best because they have the highest contrast against Valorant’s map textures and character outlines.
3. Does changing my crosshair actually improve my aim?
A better crosshair won’t improve your raw reaction time, but it can improve your visual clarity and confidence, leading to more consistent headshots.
4. Why do pros use such small crosshairs?
Pros have exceptional mouse control. A small crosshair allows them to see more of the enemy’s head, which is crucial for pixel-perfect accuracy at long distances.
5. What is the “Circle” crosshair code?
The hollow circle (often used for training) can be made with: 0;P;c;1;h;0;d;1;z;3;f;0;0t;3;0l;2;0o;2;0a;1;0f;0;1b;0.
6. Can I have different crosshairs for different agents?
Yes! In 2026, Valorant allows you to save multiple profiles. Many players use a different crosshair for “Lineup” agents like Sova or Viper compared to entry duelists like Jett.
🔥 2026 Trending Games
GTA 6 🔥🔥🔥
- Call of Duty 2026
- Fortnite Chapter updates
- Valorant new agents
- EA Sports FC updates
- Minecraft AI mods
- Roblox creator economy
Cloud Gaming
- Xbox Cloud Gaming
- NVIDIA GeForce NOW
- PlayStation Cloud
- “No Console Gaming” trend
Gaming Hardware & Accessories
- Gaming laptops (RTX 4070/4080)
- Gaming monitors (240Hz / OLED)
- Mechanical keyboards
- VR headsets
Game Development / AI in Gaming
- AI NPCs
- Unreal Engine 5
- Game mods using AI
- “How AI is changing gaming”
- Esports & Competitive Gaming
- Valorant / CS2 / Fortnite esports
- Tournament prize pools
- Pro player setup
- iOS games updates
- Gacha games
- Strategy games
Gaming Subscriptions & Services
- Xbox Game Pass
- PlayStation Plus
- Ubisoft+
Gaming Security
- Account hacking
- Anti-cheat systems
- Game ban appeals
Leave a Reply Cancel reply
Related Post:
Introduction:
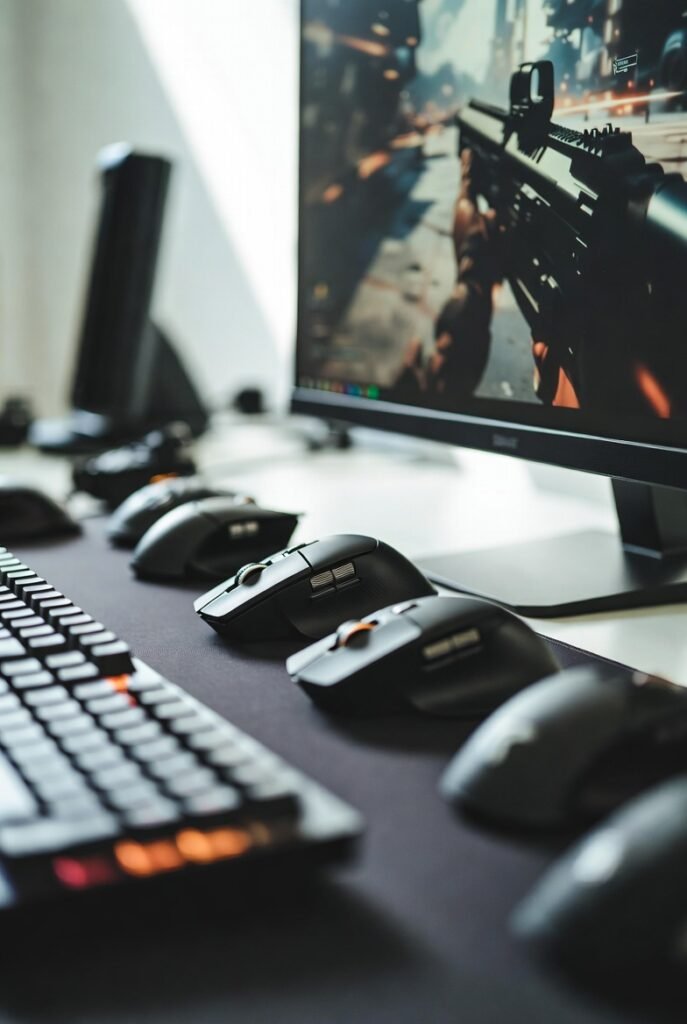
In fast-paced shooters like Valorant, CS2, Call of Duty 2026, and Fortnite, your mouse is the most important piece of esports gaming gear after your monitor.
A good FPS gaming mouse can reduce latency, improve tracking, and give you the consistency you need to hit precise headshots.
However, the “best gaming mouse for FPS” is not the most expensive one; it is the one that fits your hand, grip style, and preferred sensitivity.
This 2026 FPS mouse buying guide will walk you through DPI, weight, sensor, polling rate, wired vs wireless, and the exact settings many pro players use so you can make a confident choice.

Core Features of a Great FPS Gaming Mouse
Sensor: The Heart of an FPS Mouse
For competitive FPS games, you should always choose a mouse with a high-end optical sensor.
Modern flagship sensors from brands like Razer and Logitech track extremely accurately at high speeds and low sensitivities, which is critical for flick shots and micro-corrections.
Key things to look for in a sensor:
- True tracking at low and high speeds (no acceleration)
- High maximum DPI (usually up to 20,000–35,000, even if you never use it)
- Stable tracking on common mousepads (cloth and hybrid surfaces)
For example, Razer’s Focus Pro 35K sensor offers up to 35,000 DPI and excellent tracking, making it highly suitable for Valorant and CS2.
DPI Explained: What Pros Actually Use
DPI (dots per inch) controls how far your cursor moves on-screen for a given physical movement of the mouse.
Higher DPI means faster cursor movement, while lower DPI provides more granular control, which is why many pro FPS players use relatively low DPI settings.
Typical pro ranges:
- Most CS2 pros: 400 or 800 DPI
- Recommended CS2 range: 400–800 DPI with in-game sensitivity around 1.5–2.5
- Many Valorant pros also stay in the 400–800 DPI range and adjust in-game sensitivity for comfort.
A useful concept is eDPI (effective DPI):
eDPI=DPI×in‑game sensitivityeDPI=DPI×in‑game sensitivity
Example: 800 DPI × 1.5 sensitivity = 1200 eDPI.
Practical recommendation for a new FPS mouse in 2026:
- Start with 800 DPI and moderate in-game sensitivity (1.0–2.0 for CS2 / Valorant)
- Turn off mouse acceleration in both Windows and in-game for consistent aim.
Polling Rate: 1000 Hz vs 8000 Hz
Polling rate is how often your mouse reports its position to your PC, measured in Hz.
A 1000 Hz mouse updates every 1 ms, while an 8000 Hz mouse updates every 0.125 ms, which can reduce input delay.
Recent lab tests show:
- 1000 Hz is still sufficient for casual and many competitive players.
- 8000 Hz (8K) polling can reduce motion latency by around 1.4 ms and smooth out micro-stutters, which matters to high-level players.
If you play ranked Valorant, CS2, or CoD 2026 seriously, a gaming mouse with a high polling rate (1000 Hz minimum, 8000 Hz ideal) is a strong choice—assuming your PC can handle the additional CPU load.
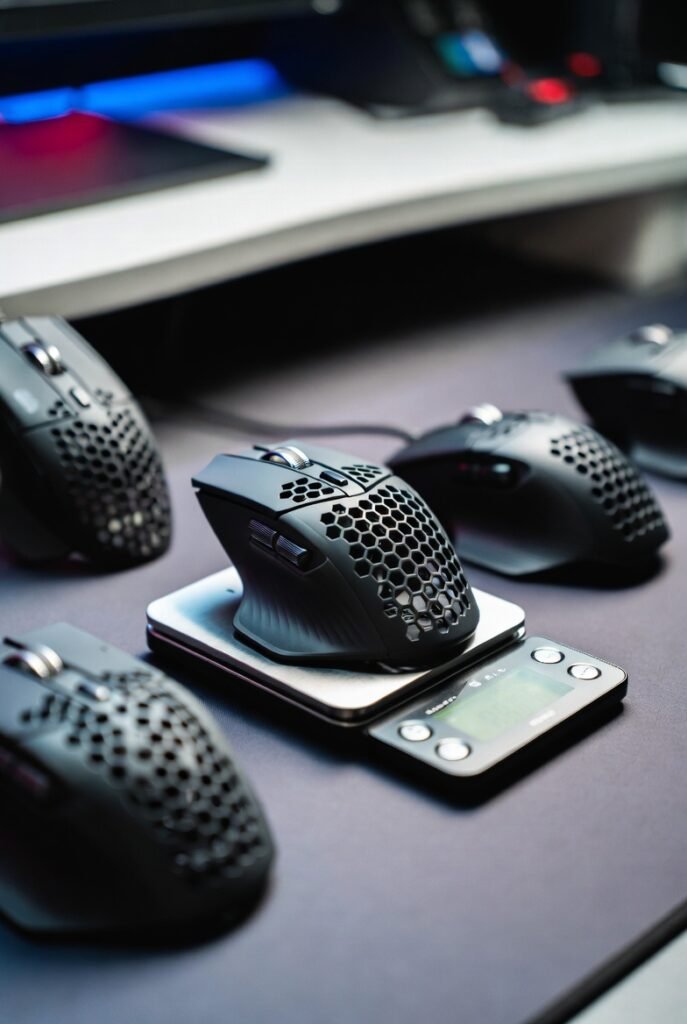
Weight: Lightweight vs Heavy for FPS
Weight has become one of the most important factors for FPS gaming mice.
Ultralight mice reduce fatigue and make fast flicks and large swipes easier, especially in tactical shooters.
Current 2026 trends:
- Ultralight champion example: Razer Viper V3 Pro at around 54 g.
- Popular high-end esports mice often sit between 54–65 g.
- Heavier, MMO-style mice (90 g+) are better suited for games that need many buttons, not pure FPS precision.
If your main goal is performance in Valorant or CS2, aim for an ultra-light or lightweight gaming mouse under about 70 g if possible.
Understanding the Core Specs of an FPS Mouse
When you’re searching for the best FPS gaming mouse, you’ll be hit with a wall of technical jargon. Let’s strip away the marketing fluff and focus on the three pillars that actually impact your headshot percentage: weight, sensor precision, and latency.
The Weight Revolution: Is Lighter Always Better?
In 2026, the industry standard for a lightweight gaming mouse for FPS has plummeted. While 80g was considered “light” a few years ago, today’s top-tier esports mice, such as the Razer Viper V3 Pro and the ASUS ROG Harpe II Ace, weigh in between 48g and 54g.
- Why it matters: Lower mass means less inertia. You can start a flick faster and, more importantly, stop it more precisely on a target’s head.
- The “Goldilocks” Zone: Most competitive players prefer mice between 45g and 60g. Anything heavier can cause fatigue during long sessions; anything lighter can sometimes feel “flighty” or hard to control for high-sensitivity players.
Sensors and DPI: Beyond the Numbers
You might see mice boasting 44,000 DPI, but here is a secret: most pros still play at 400 or 800 DPI. What truly matters is the sensor’s tracking consistency and its ability to handle high speeds (IPS) and acceleration without “spinning out.”
Modern sensors like the Focus Pro 45K or the Logitech HERO 2 offer nearly 1:1 raw input. This means the cursor moves exactly where your hand moves, with zero artificial smoothing or prediction. For games like Valorant, look for a high-precision optical sensor that supports Motion Sync, which aligns the sensor’s reports with your PC’s polling intervals for a smoother feel.
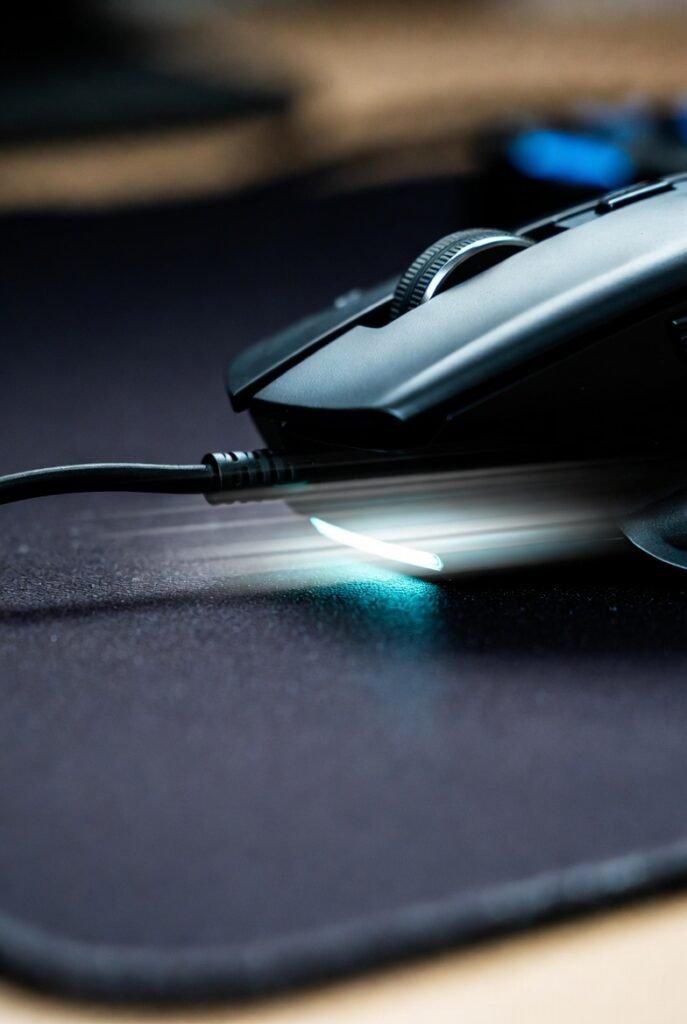
Polling Rate: The Move to 8000Hz
A standard gaming mouse has a polling rate of 1000Hz (reporting its position 1,000 times per second). In 2026, 8K polling (8000Hz) has become the benchmark for competitive FPS gaming gear.
- 1000Hz: 1ms delay.
- 8000Hz: 0.125ms delay.
While the difference is subtle, it results in much smoother cursor movement, especially if you are using a high-refresh-rate monitor (360Hz or 540Hz). However, keep in mind that 8K polling can be taxing on your CPU and will drain a wireless mouse’s battery much faster.
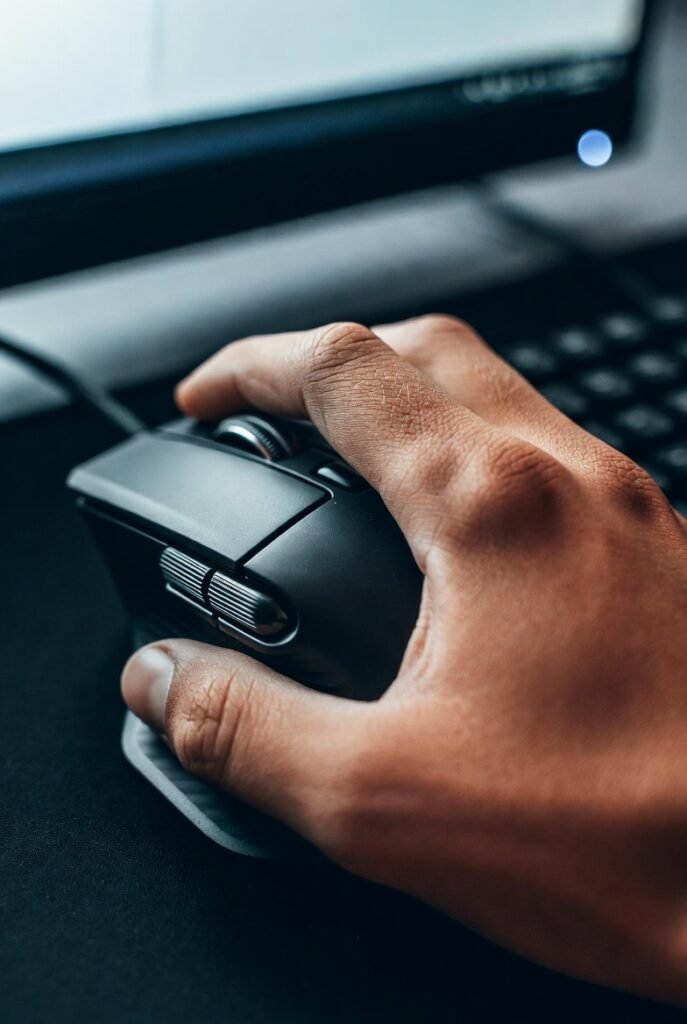
Grip Styles: Matching Shape to Your Hand
The best specs in the world won’t save you if the mouse is uncomfortable. Your “grip style” determines which mouse shape will feel natural.
1. Palm Grip
The entire hand rests on the mouse. This is common for players who use large, ergonomic mice like the Razer DeathAdder V4 Pro or the ZOWIE EC series.
- Best for: Stability and long-term comfort.
- Recommended Shape: Ergonomic (asymmetrical).
2. Claw Grip
Only the fingertips and the bottom of the palm touch the mouse. This is the most popular grip for competitive FPS players because it allows for fast clicking and precise micro-adjustments.
- Best for: Aggressive flicking and fast trigger response.
- Recommended Shape: Symmetrical with a pronounced hump in the back (e.g., Logitech G Pro X Superlight 2).
3. Fingertip Grip
Only the fingertips touch the mouse; the palm remains completely off. This provides the most range of motion but requires the most finger strength.
- Best for: Vertical tracking and extreme agility.
- Recommended Shape: Small, short, and ultra-lightweight symmetrical mice.
Comparison of Top FPS Mice in 2026
| Model | Weight | Max Polling Rate | Sensor | Best For |
| Logitech G Pro X Superlight 2 | 60g | 8000Hz | HERO 2 (44K) | Reliability & Shape |
| Razer Viper V3 Pro | 54g | 8000Hz | Focus Pro 35K | Pure Performance |
| ASUS ROG Harpe II Ace | 48g | 8000Hz | AimPoint Pro | Ultra-Lightweight |
| Vaxee XE v2 Wireless | 63g | 4000Hz | PAW 3395 | Build Quality & Clicks |
| 8BitDo Retro R8 | 72g | 4000Hz | PAW 3395 | Budget/Retro Aesthetic |
Wired vs. Wireless: Is the Cable Dead?
Five years ago, professional gamers were wary of wireless lag. Today, that debate is over. Best wireless gaming mice for FPS now feature latency that is actually lower than many wired competitors.
- Wireless Pros: Complete freedom of movement. No “cable drag” that can mess up your aim.
- Wireless Cons: Higher price point and the need to charge (though most now last 80+ hours on a single charge).
- Wired Pros: Cheaper and lighter (no battery). The Endgame Gear OP1 8K is a fan favorite for those who want 8K polling without worrying about battery life.
Common Mistakes When Buying a Gaming Mouse
- Chasing High DPI: Don’t buy a mouse just because it has “50,000 DPI.” You will likely never use more than 1600. Focus on the sensor’s signal purity instead.
- Ignoring Hand Size: If you have small hands, a “Top Rated” large ergonomic mouse will feel like a brick. Always check dimensions (Length x Width x Height).
- Overlooking Mouse Feet: The glide is as important as the sensor. Look for 100% Virgin Grade PTFE feet or aftermarket glass skates for the smoothest experience.
- Buying for Features over Shape: RGB lighting and 12 side buttons are useless in a fast-paced shooter. In an FPS, less is more.
- Read More:
Best Practices for Peak Performance
To get the most out of your new esports gaming gear, follow these expert tips:
- Turn Off Mouse Acceleration: In Windows, ensure “Enhance Pointer Precision” is unchecked. You want your movements to be linear.
- Match Your Polling Rate to Your Monitor: If you have a 144Hz monitor, 8000Hz is overkill. If you have a 540Hz monitor, 4K or 8K polling is highly recommended.
- Use a Consistent Surface: A top-tier mouse on a cheap, dirty desk pad is a waste. Invest in a dedicated gaming mousepad (cloth or glass) and keep it clean.
- Warm Up Your Grip: Before jumping into a ranked match in Valorant or CS2, spend 10 minutes in an aim trainer to get your hand used to the mouse’s weight and glide.
- Read More:
Conclusion: Finding Your Perfect Aim
There is no single “best” mouse that fits every human hand. However, for competitive FPS gaming in 2026, the formula is clear: prioritize a comfortable shape, aim for a weight under 65g, and ensure the sensor has Motion Sync and high polling capabilities.
If you want a safe bet that works for almost everyone, the Logitech G Pro X Superlight 2 remains the king of consistency. If you want the absolute cutting edge of speed, the Razer Viper V3 Pro or the ASUS ROG Harpe II Ace are your best bets.
Actionable Takeaway: Determine your grip style first, then filter your choices by weight and shape. Once you buy, stick with that mouse for at least two weeks to allow your muscle memory to adapt before making a final judgment.
2026 Updated
best gaming laptop for GTA 6
Xbox Cloud Gaming vs PS Cloud
Valorant 2026 pro settings guide
top VR headset 2026 review
GTA 6 how to unlock features
competitive FPS settings US gamers
FAQ: Most Searched Questions About FPS Mice
1. What mouse do pro FPS players use most?
Currently, the Logitech G Pro X Superlight 2 and the Razer Viper V3 Pro are the most used mice in the pro scenes for Valorant and CS2. Pro players value the “safe” shapes and the proven reliability of these brands.
2. Is 8000Hz polling rate worth it?
It depends on your monitor. If you are using a monitor with a refresh rate of 360Hz or higher, 8000Hz provides a noticeably smoother and more responsive cursor. For 144Hz or 240Hz, the difference is negligible.
3. What is the best DPI for Valorant and CS2?
Most professional players use either 400 or 800 DPI. This allows for more precise arm movements. High DPI (above 1600) can sometimes lead to “pixel skipping” or jittery aim if the sensor is not perfectly calibrated.
4. Are lightweight mice better for sniping?
Yes and no. Lightweight mice are better for flick-sniping (quick reactions). However, some snipers prefer a slightly heavier mouse (70g range) for the added stability it provides when holding a steady angle.
5. Should I get a mouse with holes in it?
The “honeycomb” design was popular to save weight, but in 2026, manufacturers like Razer and Logitech have achieved sub-60g weights with solid shells. Solid shells are generally more durable and easier to keep clean.
6. Can I use a wireless mouse for competitive gaming?
Absolutely. Modern wireless technology (like Razer’s HyperSpeed or Logitech’s LIGHTSPEED) has zero latency issues. In fact, many wireless mice now have lower click latency than traditional wired office mice.
🔥 2026 Trending Games
GTA 6 🔥🔥🔥
- Call of Duty 2026
- Fortnite Chapter updates
- Valorant new agents
- EA Sports FC updates
- Minecraft AI mods
- Roblox creator economy
Cloud Gaming
- Xbox Cloud Gaming
- NVIDIA GeForce NOW
- PlayStation Cloud
- “No Console Gaming” trend
Gaming Hardware & Accessories
- Gaming laptops (RTX 4070/4080)
- Gaming monitors (240Hz / OLED)
- Mechanical keyboards
- VR headsets
Game Development / AI in Gaming
- AI NPCs
- Unreal Engine 5
- Game mods using AI
- “How AI is changing gaming”
- Esports & Competitive Gaming
- Valorant / CS2 / Fortnite esports
- Tournament prize pools
- Pro player setup
- iOS games updates
- Gacha games
- Strategy games
Gaming Subscriptions & Services
- Xbox Game Pass
- PlayStation Plus
- Ubisoft+
Gaming Security
- Account hacking
- Anti-cheat systems
- Game ban appeals
Leave a Reply Cancel reply
Related Post:

How to Prepare for Grand Theft Auto 6 Release

How to Prepare for the Most Anticipated Games of 2026

8 Games with the Best AI Smart Enemies 2026

AI NPCs: The New Frontier in Game Design

Is Console Gaming Better Than PC Gaming in 2026?

Best Gaming Laptops For GTA 6 Buyer Ultimate 2026 Guide
-
 Entertainment4 weeks ago
AI NPCs: The New Frontier in Game Design
-
 Entertainment4 weeks ago
Is Console Gaming Better Than PC Gaming in 2026?
-
 Entertainment2 months ago
Best Gaming Laptops For GTA 6 Buyer Ultimate 2026 Guide
-

 Entertainment2 months ago
GTA 6 Release Date, Trailer, Price, Map and Everything You Need to Know
-

 Entertainment2 months ago
How to Choose Between Xbox Cloud Gaming and PS5 Plus
-

 Entertainment2 months ago
What Are the Best Strategies for Assassin’s Creed Shadows?
-

 Gaming2 months ago
ARC Raiders Early Access New Gameplay Official Release Date
-

 Business2 months ago
👉 AI in Europe: Powerful Benefits and Hidden Risks
Leave a Reply Cancel reply